When you want to start to do something you have never done before, instructions are vital, especially if you are a healthcare worker, a dental professional. And even though a Zoom chairside whitening treatment seems to be incomparably easier than a complicated dental surgery, it requires following the protocol and taking all the nuances into account if you want to receive a painful and effective procedure.
Instructions for Zoom Chairside Whitening System.
Zoom Chairside Whitening Procedure Kit to be used with: Zoom Advanced Power (Zoom 2), Zoom Advanced Power Plus (Zoom 3) and Philips Zoom WhiteSpeed (Zoom 4) Lamps
IMPORTANT NOTE: The Discus Dental Zoom Chairside Whitening System is unique in both technique and formulation. Please read and understand information below prior to initiating whitening treatment.
Prior to use, Zoom Whitening Gel must be removed from refrigeration and warmed to room temperature.
To allow gel to return to room temperature either:
1. Remove syringe from refrigeration at least 6 hours before use (preferably the night before) or
2. If removed just prior to use, place syringe in cup of hot tap water, 120°F (49°C)
for 10 minutes. Wait 5 minutes before extruding gel.
1. DEVICE DESCRIPTION
The Zoom Chairside Whitening System is a light-activated tooth whitening treatment for use in whitening discolored teeth.
2. HOW SUPPLIED
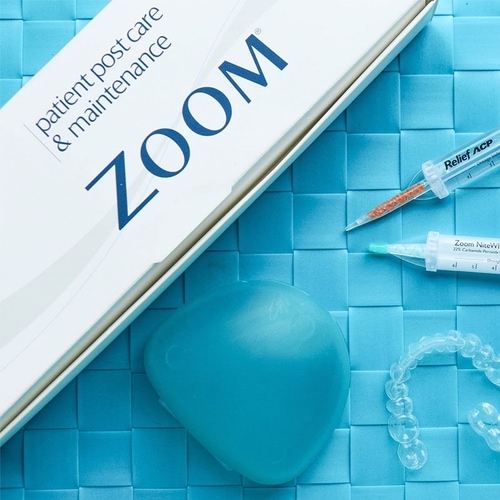
The product is designed for one-time usage. It may include Patient Post Care & Maintenance, to be sent home with patient after procedure, containing a tray case to hold custom fitted trays made from EVA material provided, a syringe of Relief® ACP Oral Care Gel for sensitivity relief and a syringe of NiteWhite® ACP, DayWhite® ACP or NiteWhite® ACP Turbo. Refer to Zoom Whitening Gel box for concentration of Hydrogen Peroxide (HP).
3. INDICATIONS FOR USE
Product is intended only for in-office use by trained dental professional for use in whitening discolored natural teeth.
3.1 Candidate Qualification
A consultation is recommended to ensure no underlying oral health issues. You may want to treat existing issues before recommending whitening treatment and disqualify any patient who is perio-involved, exhibits failing restorations or is otherwise in an unhealthy oral state.
3.2 Patients Expectations
Set realistic expectations about potential results based on oral exam. Explain results vary. Most will experience 6-8 shade change on value ordered VITA® Classical Shade Guide.™* Anatomy, calcifications, age, teeth condition, hygiene etc. determine the results each patient will attain. Teeth with yellow and brown stains will achieve greatest success while those with gray shading from tetracycline or other medications may experience less dramatic results but should improve. Crowns and other tooth-colored restorations will not whiten; to maintain uniform color, tooth-colored restorations may require replacement following whitening procedure.
4. CONTRAINDICATIONS
4.1 Use in Special Populations
Research has not evaluated possible effects of whitening procedures on all patient types, Discus Dental recommends the following whitening candidates consult a medical doctor before use:
5. SAFETY DIRECTIONS
6. PRECAUTIONS
Improper isolation may result in burning of gingiva or swollen lips due to UV light coming in contact with tissue or chemical burn due to whitening gel coming in contact with tissue. Patients more susceptible to sensitivity are those with:
7. FIRST AID INSTRUCTIONS
Contact a Poison Information Center or medical doctor at once if large quantity (over 25% of syringe) is swallowed. Provide ingredient label if possible. Do not induce vomiting and immediately give glass of water. If Hydrogen Peroxide (HP) or Carbamide Peroxide (CP) gel gets into eyes, hold eyes open, flush continuously with water for 15 minutes. If contact occurs between whitening gel and soft tissue, apply Vitamin E Oil provided to the affected area. If improper isolation leaves patient’s soft tissue exposed to light, administer a Nonsteroidal Anti-inflammatory (NSAIDs) or Acetaminophen drugs (adhering to the respective Instructions For Use).
8. CHAIRSIDE WHITENING TREATMENT
8.1 (Step 1) Pre-Procedure
8.1.1 Take Shade
Prior to beginning, shade match teeth with value-ordered VITA® Classical Shade Guide.™* B1 A1 B2 D2 A2 C1 C2 D4 A3 D3 B3 A3.5 B4 C3 A4 C4
8.1.2 Diagnose Patient
Diagnose based on dental history, oral health and sensitivity
issues (See 3.1 Candidate
Qualifications). Set patient expectations accordingly (See 3.2 Patient Expectations).
8.1.3 Treat for Sensitivity
It is recommended to prescribe the following prior to the procedure:
8.2 (Step 2) Preparation
8.2.1 Tray Fabrication
8.2.2 Clean Teeth
Pumice just prior to whitening.
8.2.3 Light Guide
Remove Light Guide and place on lamp. Turn on lamp using power button located on the side of power pack. When the Light Guide is attached, display will read “Guide Status–Guide Attached,” followed by “4 of 4 Sessions.”
8.2.4 Surgical Suction
Place surgical suction tip on high vacuum suction.
8.2.5 Vitamin E Oil
Apply Vitamin E Oil to lips to moisturize before retraction.
8.2.6 IsoPrep Retractor
Retractor provided is necessary to ensure proper positioning of lamp head and additional
protection from light. Insert retractor at an angle, (Fig 8.2a) retracting one side at a time using a dental mirror to assist in placement ( Fig 8.2b). The retractor provided is a universal size and will fit the majority of patients. Small retractors can be purchased separately.
8.2.7 “Before” Photo
Take retracted “before” photograph using a matched shade tab (Fig 8.2c).
8.2.8 Protective Eyewear
Fully recline patient and place Protective Eyewear (Fig 8.2d).
8.3 (Step 3) Isolation
8.3.1 Cotton Rolls
Place cotton rolls in center of upper and lower vestibules (Fig 8.3a). If cotton rolls are too large, unfold gauze and twist like a cotton roll.
8.3.2 Gauze
Do not substitute gauze. Gauze provided has been tested and proven to provide superior protection. Fully open gauze squares and fold into triangle. Place apex of triangle into posterior cheek (Fig. 8.3b & 8.3c), tuck balance of material into cheek, tucking ends between cotton rolls and retractor (Fig 8.3d).
8.3.3 Face Bib
Carefully place one face bib around retractor, one side at a time. Add additional bib for heavy salivatorius (Fig 8.3e).
8.3.4 Liquidam Dental Dam
Exposed dentin and tissue should be covered by barrier material. Use rule “no pink”. Remove Liquidam syringe, twist to remove cap and attach metal tip. Dry soft tissue and begin by scalloping barrier material to CEJ area (gingival margins) on upper teeth slightly overlapping enamel and interproximal spaces to form enamel seal (Fig 8.3f ). Cure application of Liquidam using curing light, e.g. FLASHlite Magna™ (Fig 8.3g). Liquidam is a resin blend that can become warm upon curing. Therefore, use sweeping motion, moving light back and forth across arch for about 10 seconds. Change to plastic tip. Fill in from cotton roll to just formed line of Liquidam and cure. Be sure to cover all interproximal areas leaving no soft tissue exposed (Fig 8.3h). On lower arch apply Liquidam, using same method. Use tip of syringe to press lightly on application to ensure it is completely cured. Material should be solid and have no give. If necessary, cure arch again for additional 5 seconds. Application should extend distal at least one tooth beyond area receiving whitening gel and be about 2mm thick.
8.4 (Step 4) Procedure
8.4.1 Zoom Whitening Gel
Remove cap of room temperature Zoom Whitening Gel syringe and attach mixing tip by aligning markings and secure with 1/4 turn clockwise. Apply gel to teeth (1-2 mm thick), using blue brush provided (Fig 8.4a). Use caution not to disturb barrier material. Gingival irritation can occur with prolonged exposure to HP gel.
8.4.2 Align Light Guide to Retractor
Once whitening gel application is complete, raise back of chair so patient is in slightly reclined position (~45 degree angle) and able to swallow comfortably while maintaining light pressure on bite block. The Light Guide is designed to ensure proper distance and alignment to maintain correct light exposure on smile zone. Slide lamp into place next to patient. Arm of lamp should be movable, but stable. Position lamp head by aligning slots on Light Guide with retractor (Fig. 8.4b)
8.4.3 Whitening Sessions
Follow prompts on display panel to turn on light and activate timer. Once light is on,
a
countdown will be displayed. It is normal for light to flicker for first few seconds. The lamp
will beep once when 3 minutes are remaining and again 3 times on the final 3 seconds of
cycle. When time reaches zero, light will turn off and a long beep will sound. If cycle must
be interrupted, press “Pause” button. Remaining time will flash on display. To reactivate
timer, press only “Pause” button. If step is not done, fourth 15 minute session will be LOST.
Point out to patient that progress of each session will be tracked by 4 green lights on top
of lamp head, each indicating one quarter of a session.
During each 15 minute session, make sure patient has means of communication, e.g. a
bell, or do not leave the patient unattended. After each session, gently pull lamp away
from patient taking care to not dislodge isolation materials. Carefully remove gel with
surgical suction tip and/or wipe surface of enamel clean with damp gauze. Do not irrigate
as force of water may pull dam loose and saturate isolation materials. Check isolation
materials to ensure “no pink” tissue is visible. Replace or add isolation if needed. Follow
same instructions as above for remaining sessions.
Note: For sensitive patients pull back lamp head within Light Guide or attach Light Guide
Extender to further increase distance from light. However, please note these activities may
reduce results, therefore a fourth 15 minute session may be needed
Tip: If patient notes irritation at margin use Vitamin E Oil to sooth tissue. If
patient notes
tooth sensitivity, place Relief ACP found in Patient Post Care & Maintenance, on lingual
surface(s) for remaining sessions.
After last cycle is complete, detach Light Guide from retractor and
pull lamp away from
patient. Suction or wipe the whitening gel from teeth. Moisten gauze and cotton rolls,
remove isolation materials. If barrier material remains interproximally, remove with floss.
9. POST TREATMENT
9.1 “After” Photo
Reinsert retractor, take retracted “after” photo with lighter shade tab in place. Measure shade change by counting shade shift according to value-ordered shade guide (Fig. 9.1a).
9.2 Relief® ACP ORAL CARE GEL
Relief ACP has been shown to decrease sensitivity and remineralize teeth. If patients experience sensitivity, place into take-home trays and seat on patient. Normal wear time is 10-30 minutes. If tray is not available, brush product on teeth. Do not spit for approximately 3 minutes. For best results, do not drink or eat for 30 minutes after application.
9.3 Patient Post Care & Maintenance
Instruct patient on use including Relief ACP and take-home whitening maintenance product.
9.3.1 Take-Home Whitening Maintenance
Use after 24 hours to maintain or to further enhance Zoom Chairside Whitening results. Depending on region, Zoom Kits are available with the following options:
9.3.2 Maximizing Results
10. STORAGE INSTRUCTION
For Gel: Refrigerate gel at 2°C – 10°C (36°F and 50°F). Storage temperature above 10°C
(50°F) will result in reduced shelf life.
Usage Temperature: >60°F/15°C
Bleach Infiniter - developments in IT-technologies for dental organizations. We work
since 2015
WhatsApp / Telegram / Signal


Bleach-Infiniter.com
All rights reserved, 2015-2019


